Time Based Menu
This feature allows the user to configure different menu to be shown in the system during the different hours.
It can be configured according to each individual terminal as well.
To use this feature, go to Settings -> Time Based Menu.

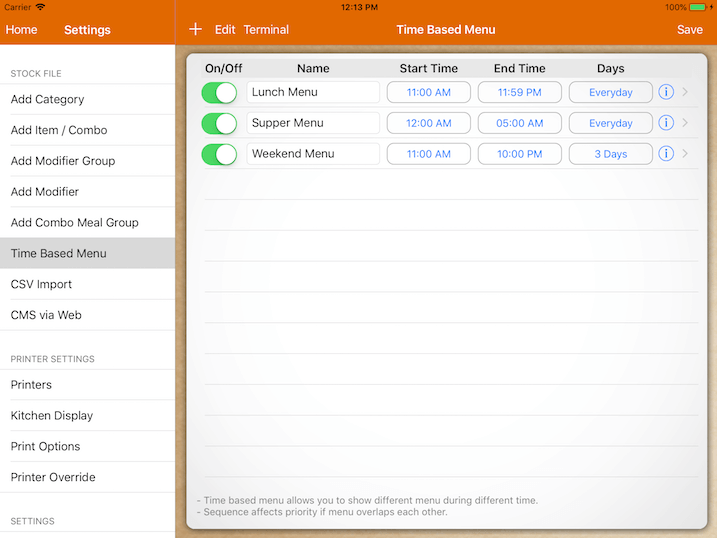
To add a time-based menu, click on the ‘+’ button located at the top left corner as shown above.
Then insert a name and configure the desired time range for the time-based menu to be in effect.
Next, click on the info icon located on the right.
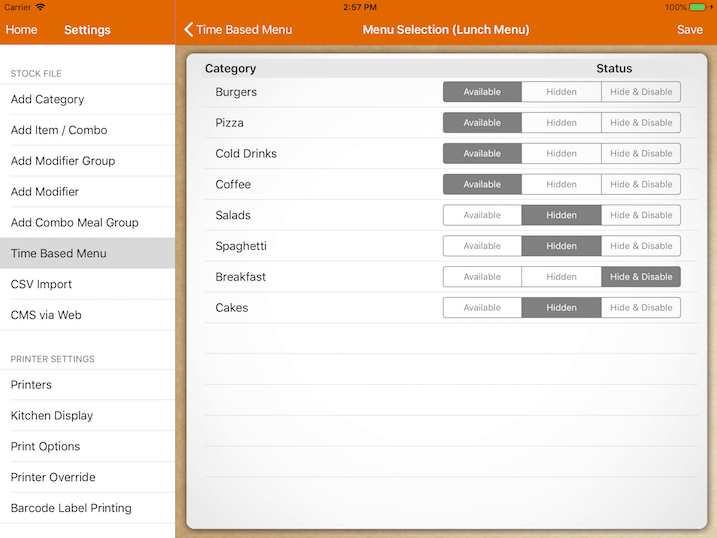
Upon selecting the info icon, the page will be directed to the chosen Menu Selection.
User is required to choose which category to be available in this selected time-based menu.

There are three settings under Status and are stated as below:
Available – Category button is available and all items under the category will be available for ordering.
Hidden – Category is hidden, however, items can still be ordered through barcode scanning or using the item search function.
Hide & Disable – Category is hidden and the item cannot be ordered.
Examples are given based on the image shown above:
-when the “Burgers” category status is “Available”, it indicates that all the burger items will be shown at the cash register an available for ordering.
-when the “Salads” category status is “Hidden”, it indicates that all the salad items it will not be shown at the cash register. However, it is still available for order through barcode scanning or using the item search function.
-when the “Breakfast” category status is “Hide & Disable”, it indicates all the breakfast items will be hidden and will not be available for order.
Upon configuration, click on ‘Save’ located at the right top.
Multiple time-based menus can be configured, however, if there is an overlap in the timing of the menu set up, system will only use the first menu in the sequence.
Example based on the first screenshot image:
Lunch Menu starts from 11 a.m. to 11:59 p.m. every day.
Weekend Menu starts from 11 a.m. to 10:00 p.m. from Friday to Sunday.
On Friday at 12 p.m., the system will still put Lunch Menu into effect since it is higher in sequence.
Configuring Time-Based Menu by Terminal
The user is able to set up a different menu to be displayed for each device or terminal.
The setup has to be done in the main POS regardless of which device it will be used for.
Upon setting it up, the terminal has to sync with the main again to have the settings in effect.
If there is no time-based menu set up for the second terminal, it will follow the main POS time-based menu configuration.
Before configuring a time-based menu for the terminal, make sure that the terminal has been paired with the main POS.

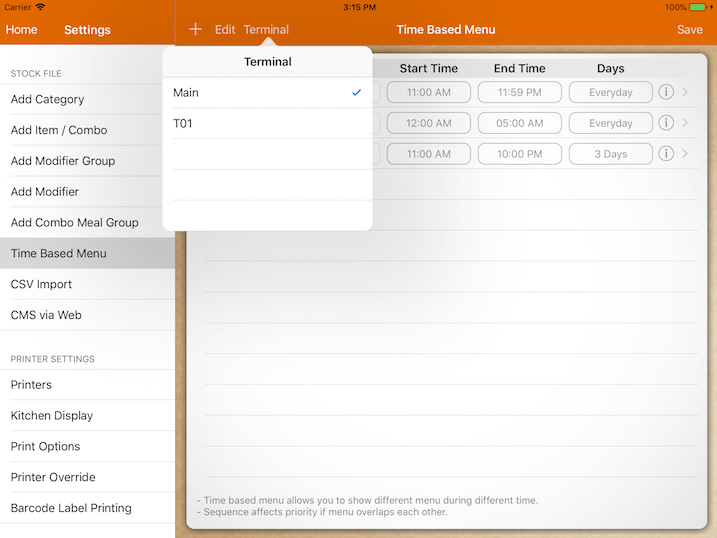
Click on the ‘Terminal’ button located at the top as shown in the first screenshot.
Select the desired terminal for configuration as shown below.

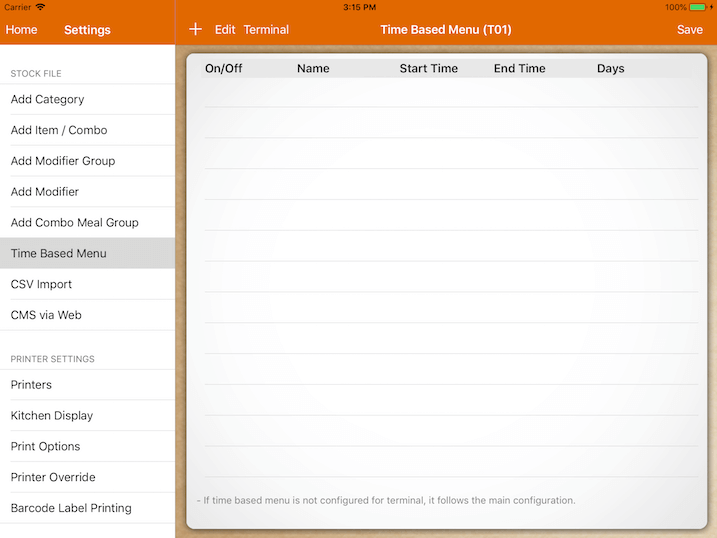
By default, the list would be empty and so the second terminal will follow the setup of the main as shown below.

If you proceed to add any time-based menu for it, the terminal will have its own settings.
