Ordering Menu
This guide explains the ways to order through the menu.
Including menu gesture, setting up the list of favorite items and quick key.
Favorites
The Favorite can be set up for easier access.
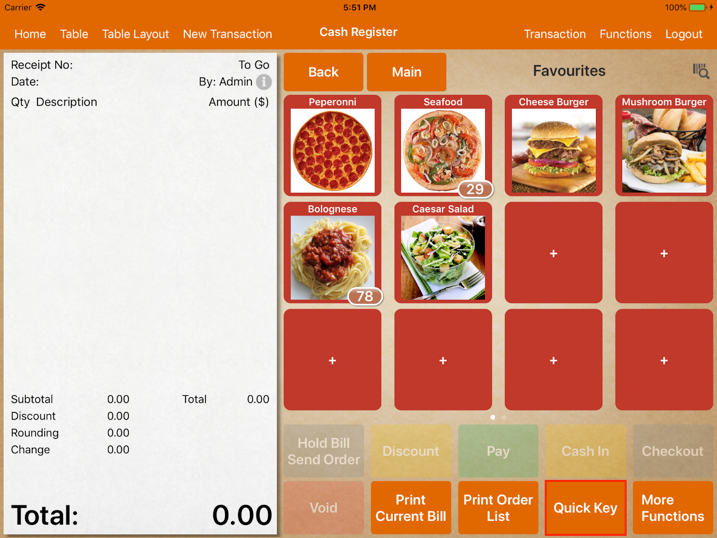
To enter Favorites, tap on the Favorite button located beside More Functions.

To add an item to your favorite, simply tap on the + button and select the item.
To remove it, swipe up on the item until the pop up appears.

To exit Favorites, click on the Quick Key button multiple times until it goes back to the Main Menu.
Quick Key
To access a quick key, click on the Favorite button twice.
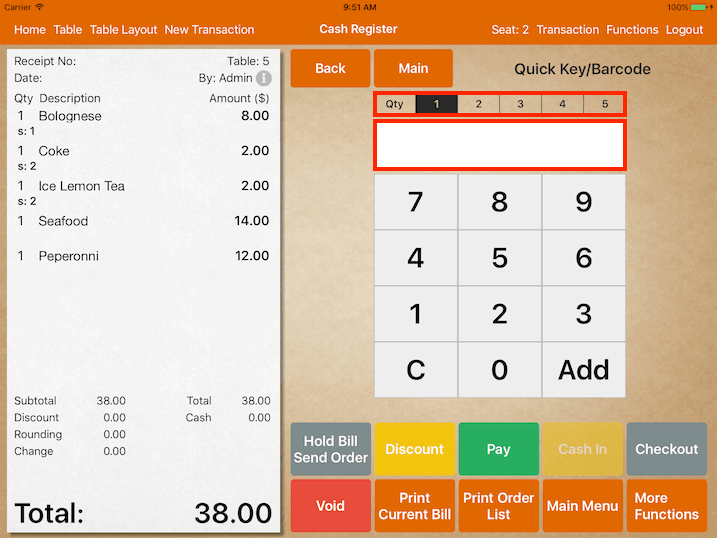
Upon clicking the Favorite button twice, the Quick Key set will be shown.
At this page, key in barcode number or quick key number that has been set previously to the order.
If the category’s quick key is ’01’ and the item quick key is ‘001’, key in ‘01001’ to add the item.
If the category’s quick key is blank, key in ‘001’ to add the item.
User can select the quantity at the top of the text field.
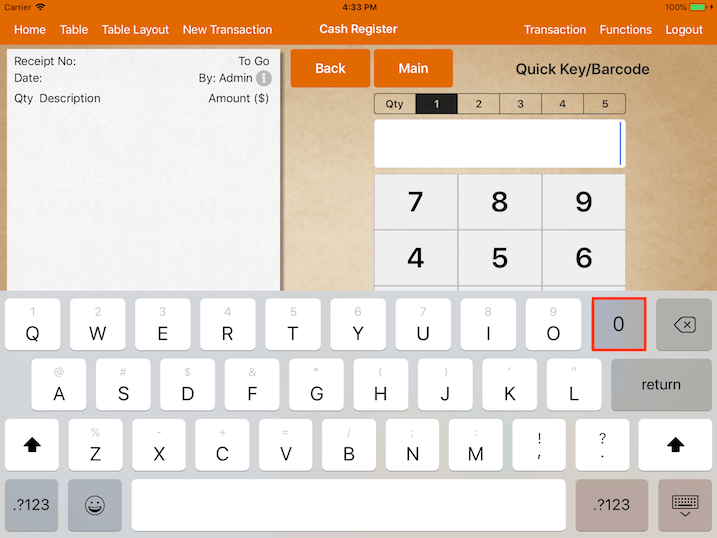
If the quick key is inclusive of alphabets, simply tap on the text field and the keyboard will appear.
From iOS 11 onwards, the keyboard will be slightly different as shown below:
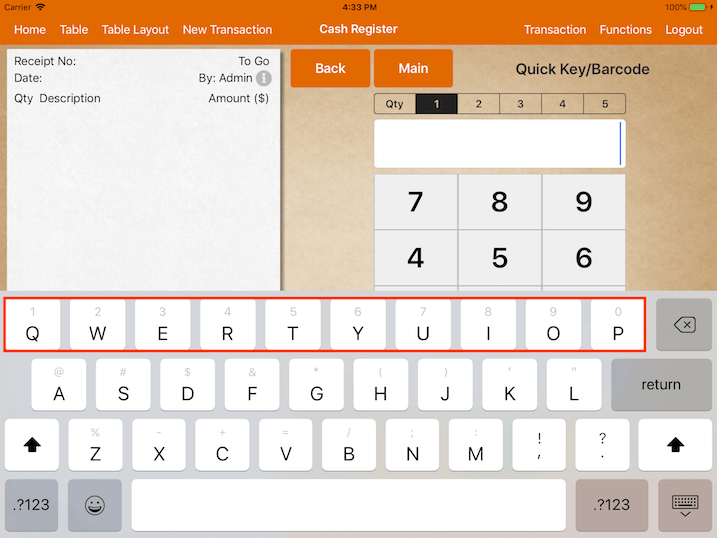
Numbers can be typed by swiping the keyboard down at the selected alphabet.
For example, swipe the keyboard “P” down and it will show as zero as shown below:
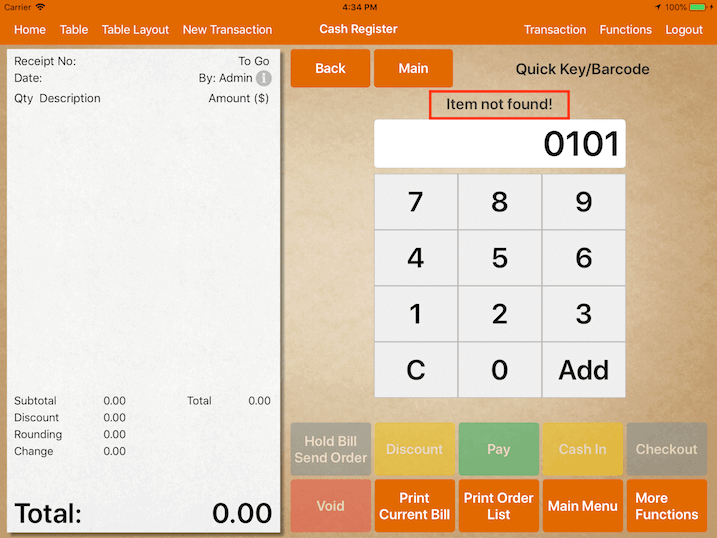
If the quick key inserted is not valid, “Item not found!” will be shown as below:
Quick Key/Barcode
To use this feature, the user will first need to set up the quick key or barcode at the items or category.
The user can choose to set up a quick key for both items and categories or item only.
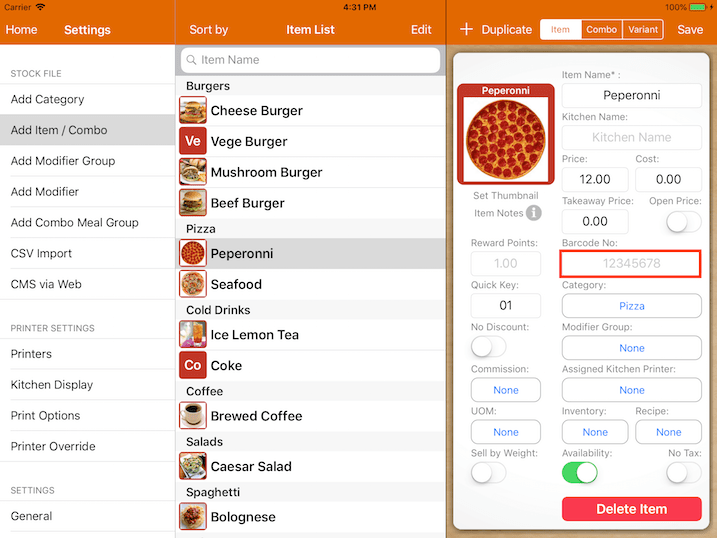
To set up a barcode for an item:
Go to Settings -> Add Item.
Select the desired item, then set up the barcode for that item as shown below.
Do note that you can set the same barcode for a different item, although it is discouraged.
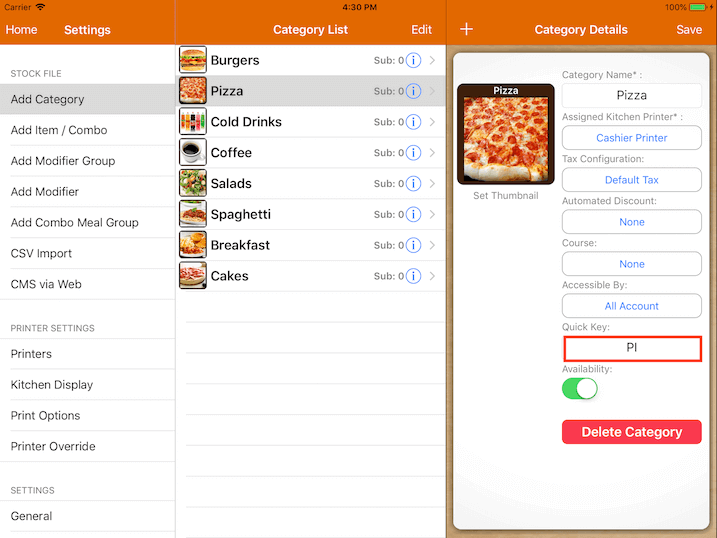
To set up a quick key for a category:
Go to Settings -> Add Category.
Select the desired category, then set up the quick key for that category at the bottom right as shown below.
To set up a quick key for an item:
Go to Settings -> Add Item.
Select the desired item, then set up the quick key for that item at the bottom right as shown below.
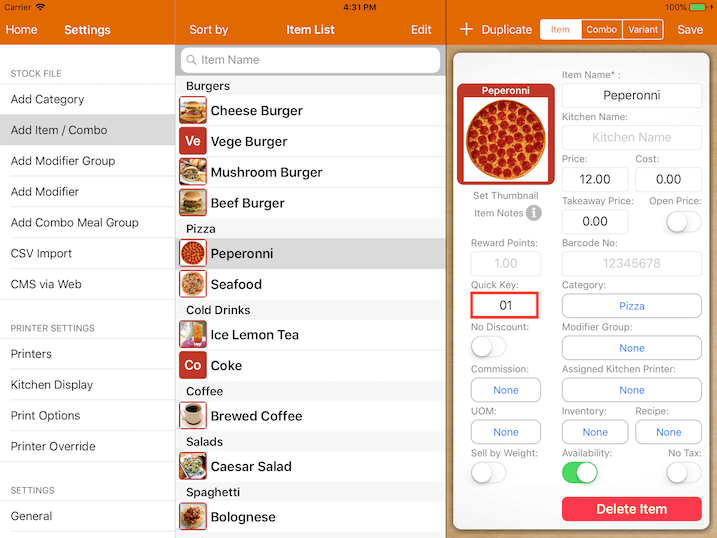
Do note that if a quick key is set only at the item but not the category, it will follow the item quick key; if there is a quick key set at the category, the quick key will need to include the category quick key.
For example, if the Pizza Category quick key is 101 and Bacon Pizza has a quick key of 222, the final quick key to be keyed in should be 101222 for Bacon Pizza.
If the item Bacon Pizza has only a quick key of 222 and no quick key is set for the category, the final quick key to be keyed in for Bacon Pizza is only 222.
Menu & Gesture
This guide explains the menu gesture available in the menu.
Both the iPhone and the iPad have different gestures and are explained below.
Menu Gesture For iPad
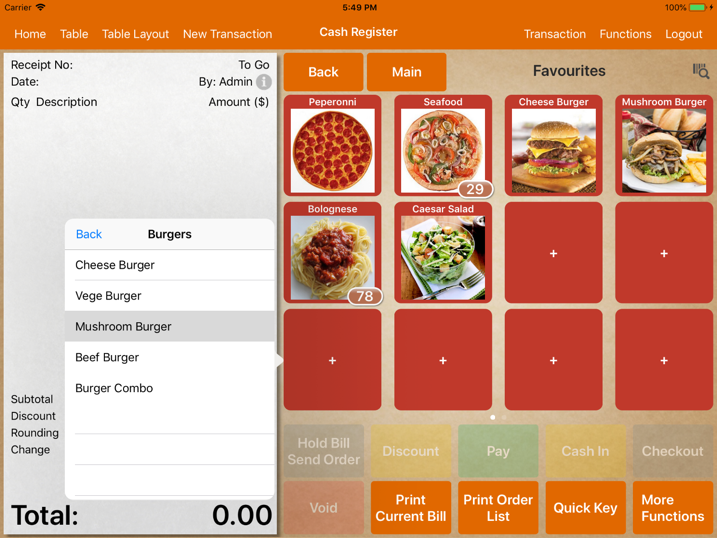
First, go to the Cash Register as shown in the image below.
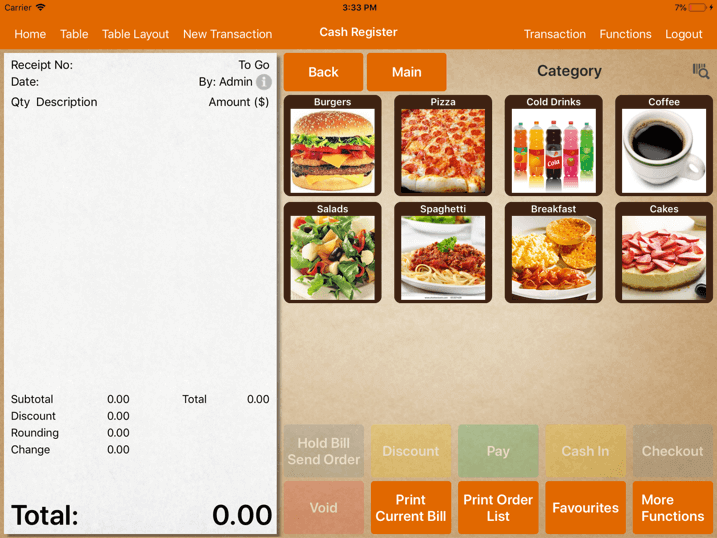
Next, select the desired product category.
In this example, the selected category is Burger.
The screen will then show all the burger items as shown below.
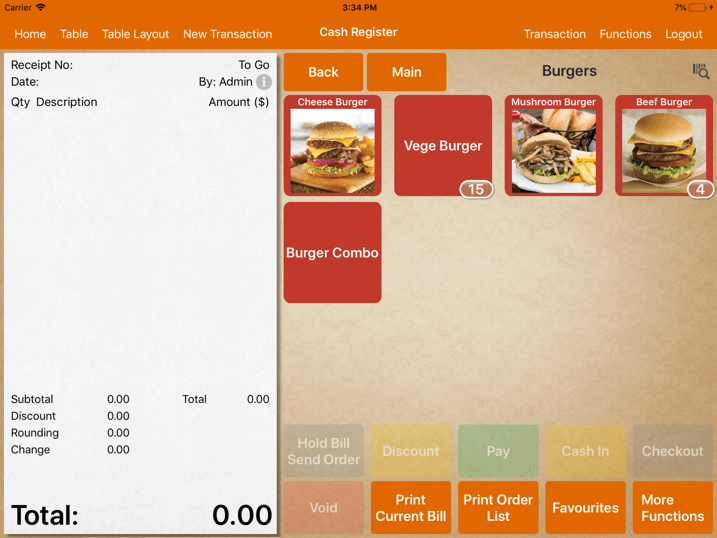
User needs to tap within the image and drag out of the image for all the menu gestures.
At the desired item, tap and swipe:
Swipe Down – To view the price of the product as shown below.
Swipe Up – To change the button color of the product as shown below.
Do note that the button color can only be changed at the main POS.
Tap & Hold – To view information about the product.
The information includes the image, pricing and description of the item as shown below.
In the product information, the user can either tap on the “<” and “>” button or swipe left and right to navigate between items.
To know more about adding item notes and photos, please refer to Add Item under Item Notes.
The menu gesture also applies to the Modifier Selection.
At the desired modifier, tap and swipe:
Swipe Down – To view the price of the modifier item as shown below.
Swipe Up – To change the button color of the modifier.
Upon changing the button color, tap on “Set” at the top right corner as shown below.
Menu Gesture For iPhone
To access to the menu gesture for iPhone, tap on the desired item category.
Next, tap the desired category, then on the desired item.
The menu gestures are explained as follows:
Tap & Hold – To view the information on the item.
Similar to the iPad, information includes the image, pricing, and the description of the item.
Swipe Right – To go back to the previous page.
Swipe Left – To view the price of the item.
